Maps and battle maps
A battle map is the picture your party fights on, with a square grid over it. Bring your own, start from a ready-made one, or take one from the Community shelf. This page covers finding your maps, adding one, lining up the grid, bringing it to life with light and weather, and fighting on it.
Where your maps live
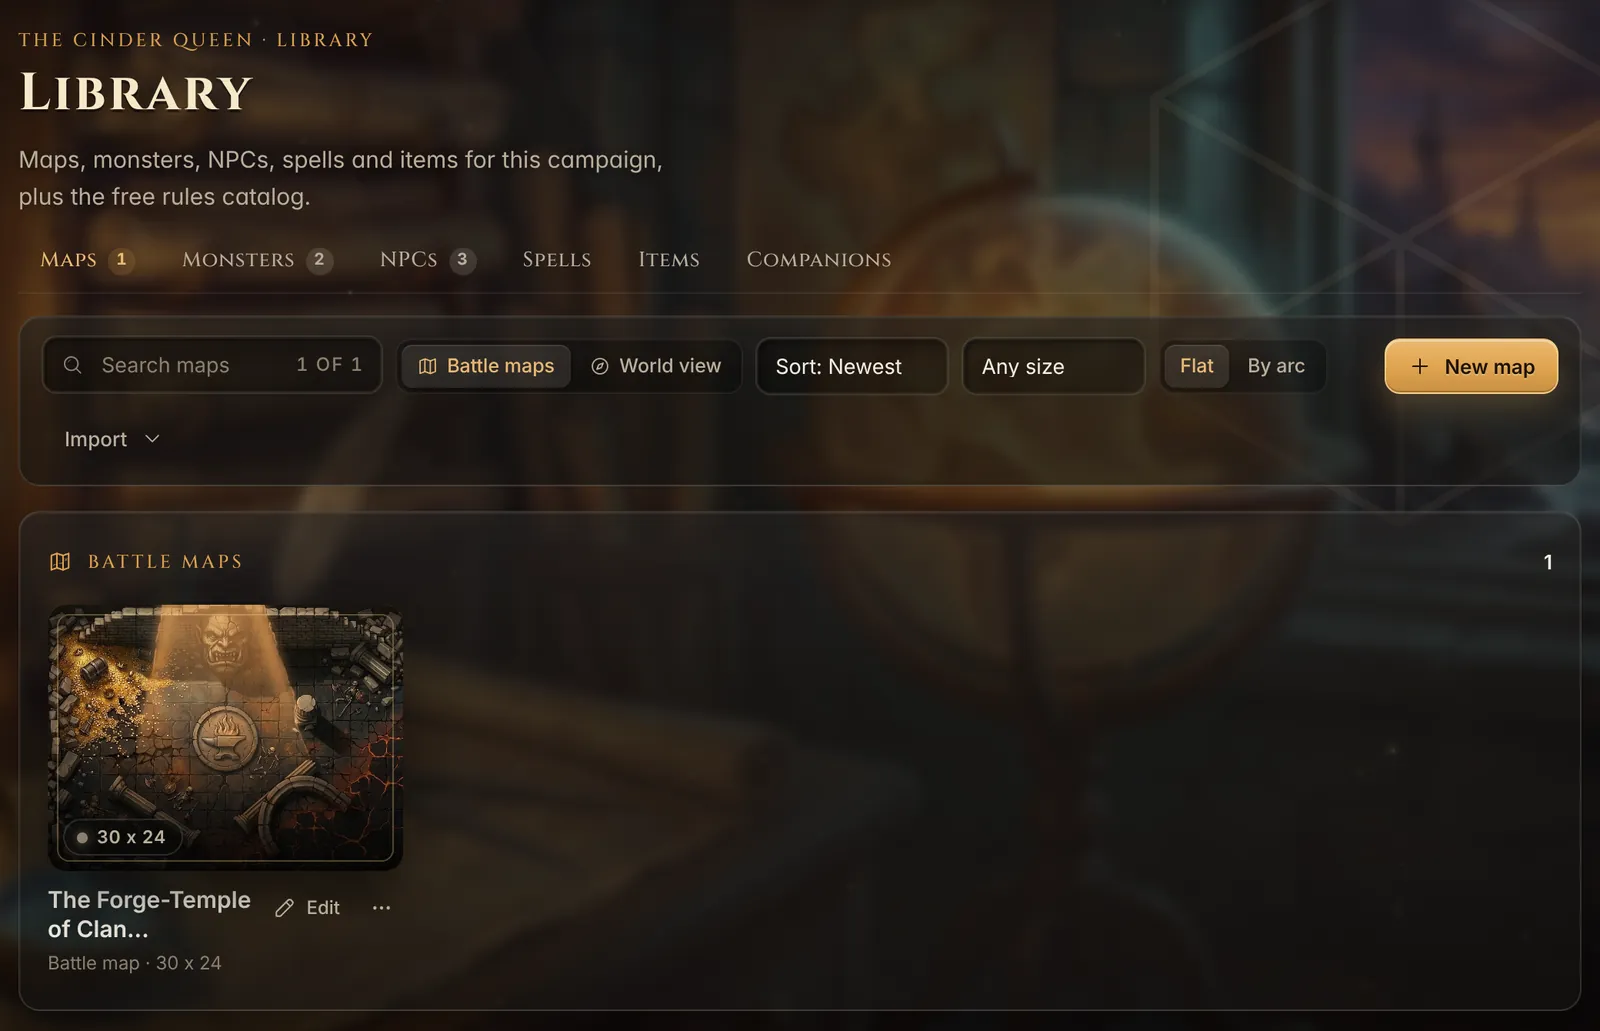
Open Library in the dock. Maps is the first tab. Every map in the campaign is a card. Click one to look at it, press Edit to open the map editor, or open its … menu to Show to players, duplicate it, or choose whether players see it as a grid or as a scene. World view holds your overland maps.
Add a map
Upload your own
Press New map, pick the kind of map (Battle, Dungeon, City or Overland), then choose Start from an image and pick the file. Any picture works: a map you bought, one you drew, a scan of a paper map. It becomes the map’s background, ready for the grid. You can also replace the picture later in the editor, or drag an image straight onto the map.
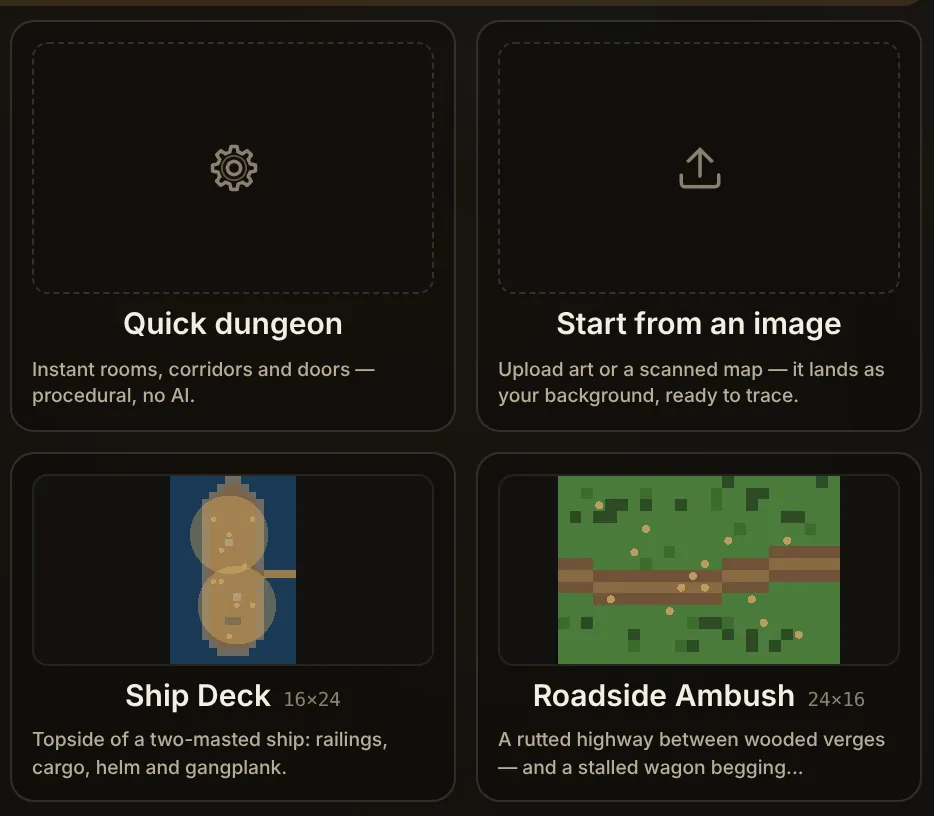
The same step offers other starting points:
- A template, such as Tavern, Forest Clearing, Ship Deck, Roadside Ambush or Riverford Crossing, ready to use or change.
- Quick dungeon: rooms, corridors and doors laid out for you in an instant.
- Blank: an empty grid at the size you choose, to paint tile by tile.
- Generate with AI: describe a scene and have it painted. This uses the optional AI helper.
Have a map from another tool? Import, Import a map file reads Universal VTT files (.uvtt, .dd2vtt) in Advanced mode, and Import a bundle brings in a map together with the creatures that belong on it.
Take one from the Community
Open Community in the dock and filter by Maps. Each map on the shelf was shared by another DM, often with its monsters. Press Add to campaign and your own copy appears in Library, Maps, ready to edit and fight on.
Line up the grid
One square is always 5 feet. A picture you upload rarely matches the grid at first, so open the map in the editor with nothing selected and use the map panel on the right:
- Size: the width and height in squares, and the cell size in pixels. Press Apply.
- Align: nudge the picture left, right, up or down in quarter squares, or scale it, until the lines in the art sit on the grid.
- Grid: square or hex, the grid’s offset, color and strength, and whether tokens snap to it.
Bring it to life: Life mode
The living board is on by default on a laptop or desktop (the switch is under Settings, Combat, Living board). With it on, the editor of a battle, dungeon or city map has a second mode, Life (Shift+L). It turns a flat picture into a lit, moving scene: firelight that flickers, lava that glows, shadows behind pillars, rain on the stones. Press Auto to have it read the picture and suggest lights, water and walls, then accept or reject what it found.
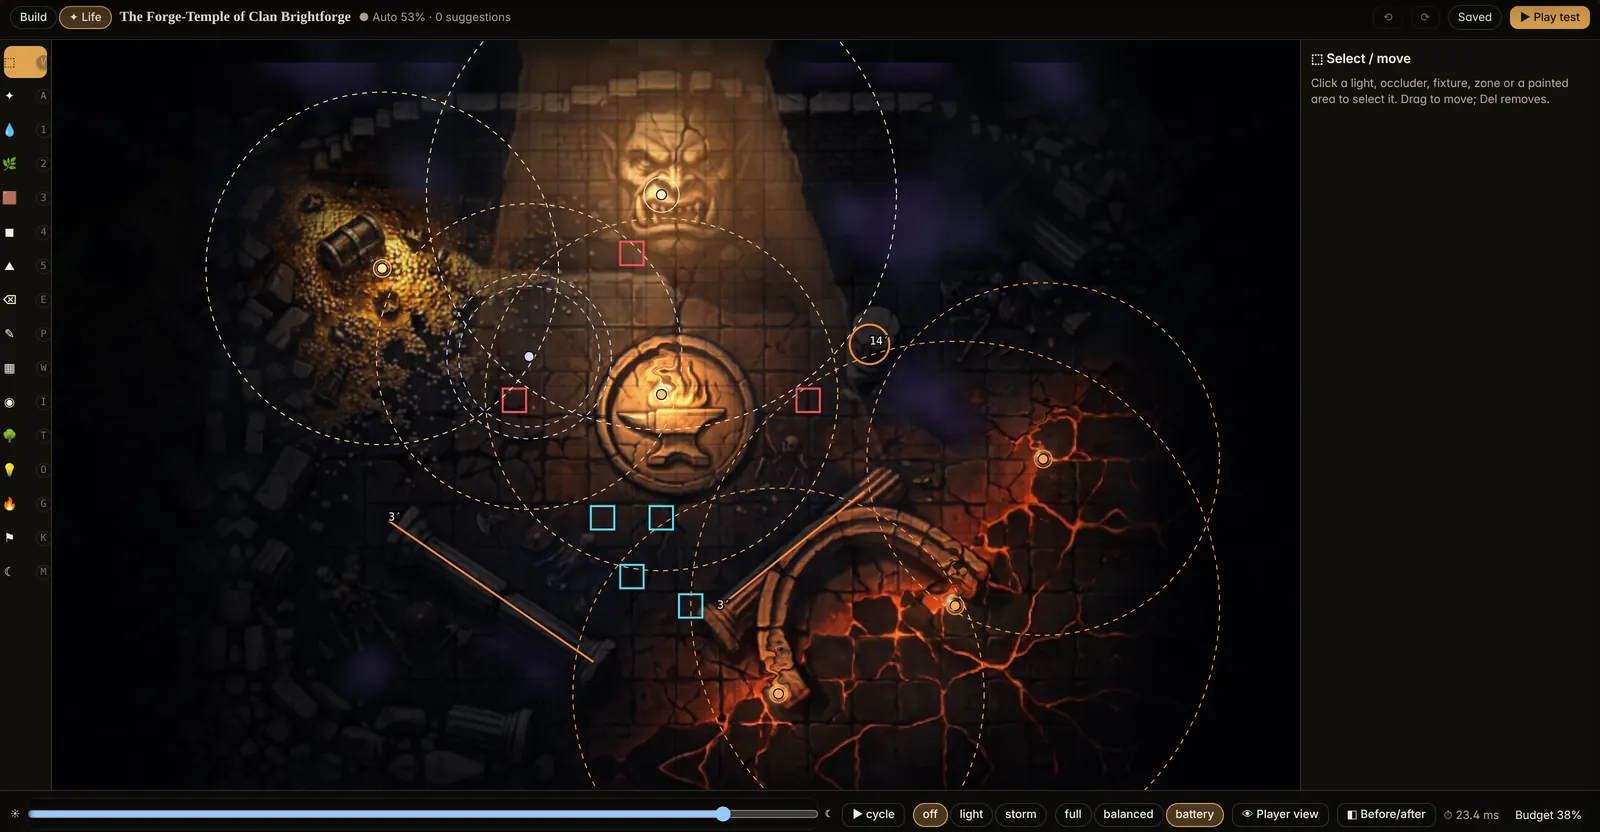
The tools, down the left:
- Light. Click to place a light from a preset (torch, hearth, lantern, candle, crystal, brazier and more) and drag its rings to set how far it reaches. A light can start unlit, for a brazier you light later.
- Walls to shadows, pillars and trees. Use the walls you drew, or click a line, so light stops where it should and casts soft shadows.
- Water, foliage, mud and dark brushes. Paint where water moves, where leaves hang overhead, where the ground is mud, and where there is only a pit.
- Elevation. Mark raised and sunken areas.
- Surface or fixture. Place a fixture such as a brazier, a fire pit, a glowing pool or a grease trap that stays hidden until you reveal it, or paint a surface square by square.
- Spawn cells. Mark where the party and the monsters start.
- Ambience. The map’s saved defaults: indoor or outdoor, the time of day, rain (off, light or storm), ground fog, drifting motes, and the sound and music bed.
The bar along the bottom previews the scene: drag from day to night or press cycle, try the rain, and press Player view to see exactly what a phone gets (lights you turned off, hidden traps and monster start squares disappear). Before/after shows the flat art beside the living one, and Play test runs a short preview from dusk to night (with rain on an outdoor map) without changing anything. Your changes save as you go.
Fight on it
A map becomes a battlefield through an encounter. In Combat, open the encounter, pick the map, and add the monsters. The builder shows the map with where everyone stands, and Open map in editor takes you back to the map if it needs work. Press Start this fight.
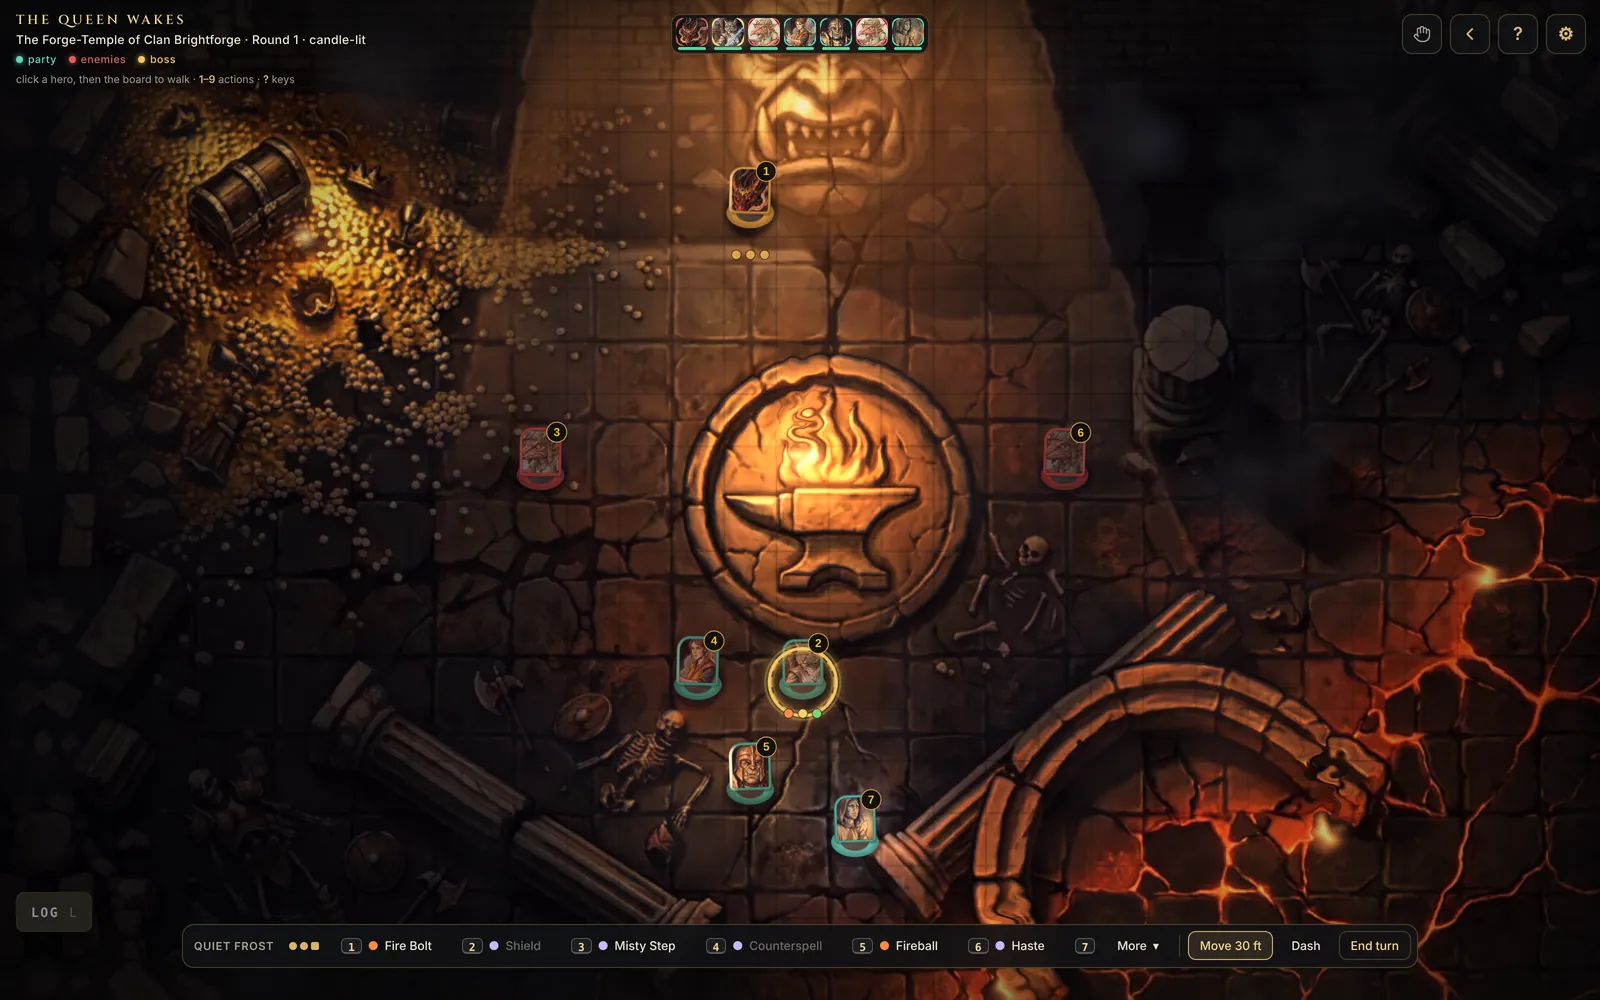
On the board, click a creature, then a square, to move it. The board shows how far it can go. During the fight the gear button holds the Weather (rain, embers, dust or snow, on every screen) and the time of day on your own screen. For the rest of the fight, see Running a session and Dice and rolls.